

Salt Painting Activity for Kids
We are embracing the change in seasons and corresponding drop in temperature. I still try to get everyone outside every day, but we are definitely not outside as much as we were in the summer. Todays’ activity is a wonderful inside activity that is just messy enough to get the kids interested, but still easy to clean.

If you still have leftover salt from making Pumpkin Pie Spiced Playdough, this is a perfect actvity to set up! It uses basic supplies that you probably already have and the clean up is quick.
Here’s what you need
Paper. We save some of the kid’s crafts, but honestly most get thrown away after a brief display on our refrigerator. I buy printer paper in bulk and use it for activities I know will be too messy to display. You could also use watercolor paper if you have it handy. This has a lot of good reviews and is less expensive per page than one I would select for a watercolor I intend to display.
Glue. I buy in bulk because we go through seasons of using a lot of glue and I hate to run out.
Salt. I bought the least expensive salt I could find at my local grocery store. No need to get fancy here.
Pipettes. I have nothing but good things to say about the set I linked. We’ve used these so many times and they have held up extremely well. I toss ours into the dishwasher and have had no issues.
Smocks. These can be helpful if your little ones like to get a little wild with the pipettes! Vaila is pretty calm, especially when she is working on something alone, so we skipped the smock for today.
Water
Cups or bowls
We used old towels for wiping up any splatters and for drying.

Set up
1-20 minutes. The setup is part 1 of the activity, so we spent upwards of 20 minutes drawing our designs. I stayed with Vaila for the first few attempts as she was getting more comfortable using the glue bottle. After I felt confident that she wouldn’t get glue everywhere and I spent some quality time with her, I was able to step to the other side of the room to clean up the kitchen.
Use glue to make a design on your paper. We used our sensory bin lid as a tray to help capture any excess.
Place the paper in the larger part of the sensory bin and sprinkle salt over your glue design. You want to make sure all of the glue is coated, so feel free to shimmy and shake here.
Let the glue dry completely, we left ours overnight.
When you are ready, mix food coloring and water in a cup.
Use pipettes to add small drops on to the salt design.
Let everything dry on a towel, drying rack, or the sensory bin lid.
Clean up
1-3 minutes
Wipe up any glue.
Empty out your extra salt and vacuum or wipe up the excess from the floor.
Empty out your food coloring and wash the cups. We had a few splatters on the table, so wipe up any rogue colored water with a towel as needed.


I set this activity up when I knew our littlest one (13 months) would be napping because it is a little messy, but it could be MUCH messier with a toddler involved. Speaking from experience, glue is not my favorite thing to clean up if it gets everywhere, so we don’t use a ton of it when I cannot give my full attention unless each child has demonstrated their ability to use it in a clean manner.
On a very much related note, here is a funny story for you:
When Brinley was newly 3, the day before Mother’s Day she asked for glue and paper to “make a surprise”. I naturally thought it would be a special project as a gift for me, especially because she made me sit far away from her and around the corner so I couldn’t see.
She was working very hard and the few times I checked on her everything seemed to be good. Suddenly she started crying hysterically because her “skin was falling off” and that’s when I noticed everything was covered in glue! Her arms. Her legs. The floor. The cabinets. Her ENTIRE paper. The glue had dried on her hands after she applied it like lotion, but apparently she did not like that sensation.
I’m laughing now as I look back, but that day is seared into my memory because I was not happy at the prospect of cleaning up such a big mess. To top it off, the glue blob of a picture wasn’t even for me! She wanted to give her Dad something special for Mother’s Day since he wasn’t getting any other gifts. It took over a week to dry completely, but she was very attached to this piece of art she worked so hard on. After definitely losing my cool about the glue being everywhere and quite challenging to clean, this paper stared at me all week and reignited my guilt every time I walked by it. Now this story reminds me of how thoughtful she is, and that has not changed, but I’m still a little skeptical anytime we use glue.


Here are my unofficial guidelines for using glue:
Only use it if you have enough time and space to let things dry.
It has never once gone well for me if I have a newborn, so I move the glue out of reach until I’m out of the fresh baby phase.
Use a towel or tray to catch drips.
Let kids practice so they can get better, but supervise at first!


Ok, I’m done talking about glue.
This activity was so fun! There are a lot of great skills to be practiced here and I love when there is immediate and natural feedback for the kids. Squeezing the glue is a great way to work on hand strength and the designs allow for coordination and precision skills. Sprinkling the salt was a great problem solving activity for Vaila. We talked through how to re-use some of the salt in the bin before pouring out any more and I showed her how to tilt the paper or bin to get full coverage.
Pipettes are always a great tool for fine motor practice and impulse control. This activity in particular really works best with small drops spaced away from each other and time to allow the color to travel. Too much colored water dropped onto the page at once will just run, as in the picture below.

Vaila and I got to work cooperatively on our designs and it really felt good for me to connect with her. Another thing I loved about this activity was that it filled up some time on two separate days. Lately I feel like I’m straddling two different phases of parenting and it can be challenging. Ellette is just 13 months, so we are still dealing with teething, not sleeping through the night, and she gets into everything!
The bigger kids crave artistic and creative activities sometimes, but there are days that I’m too tired to set up an elaborate activity. Even if I had the energy, a non-stop moving and curios toddler limits my ability to sit down with Vaila or Brinley and focus on one task.
This activity was perfect to split up and get each step completed during nap time. I think that fills Vaila’s cup to have quality time with me. She got to be the center of my attention for a little while, which doesn’t happen often. She was eager to get to the food coloring part and we had to check on the glue every hour for the rest of the first day!
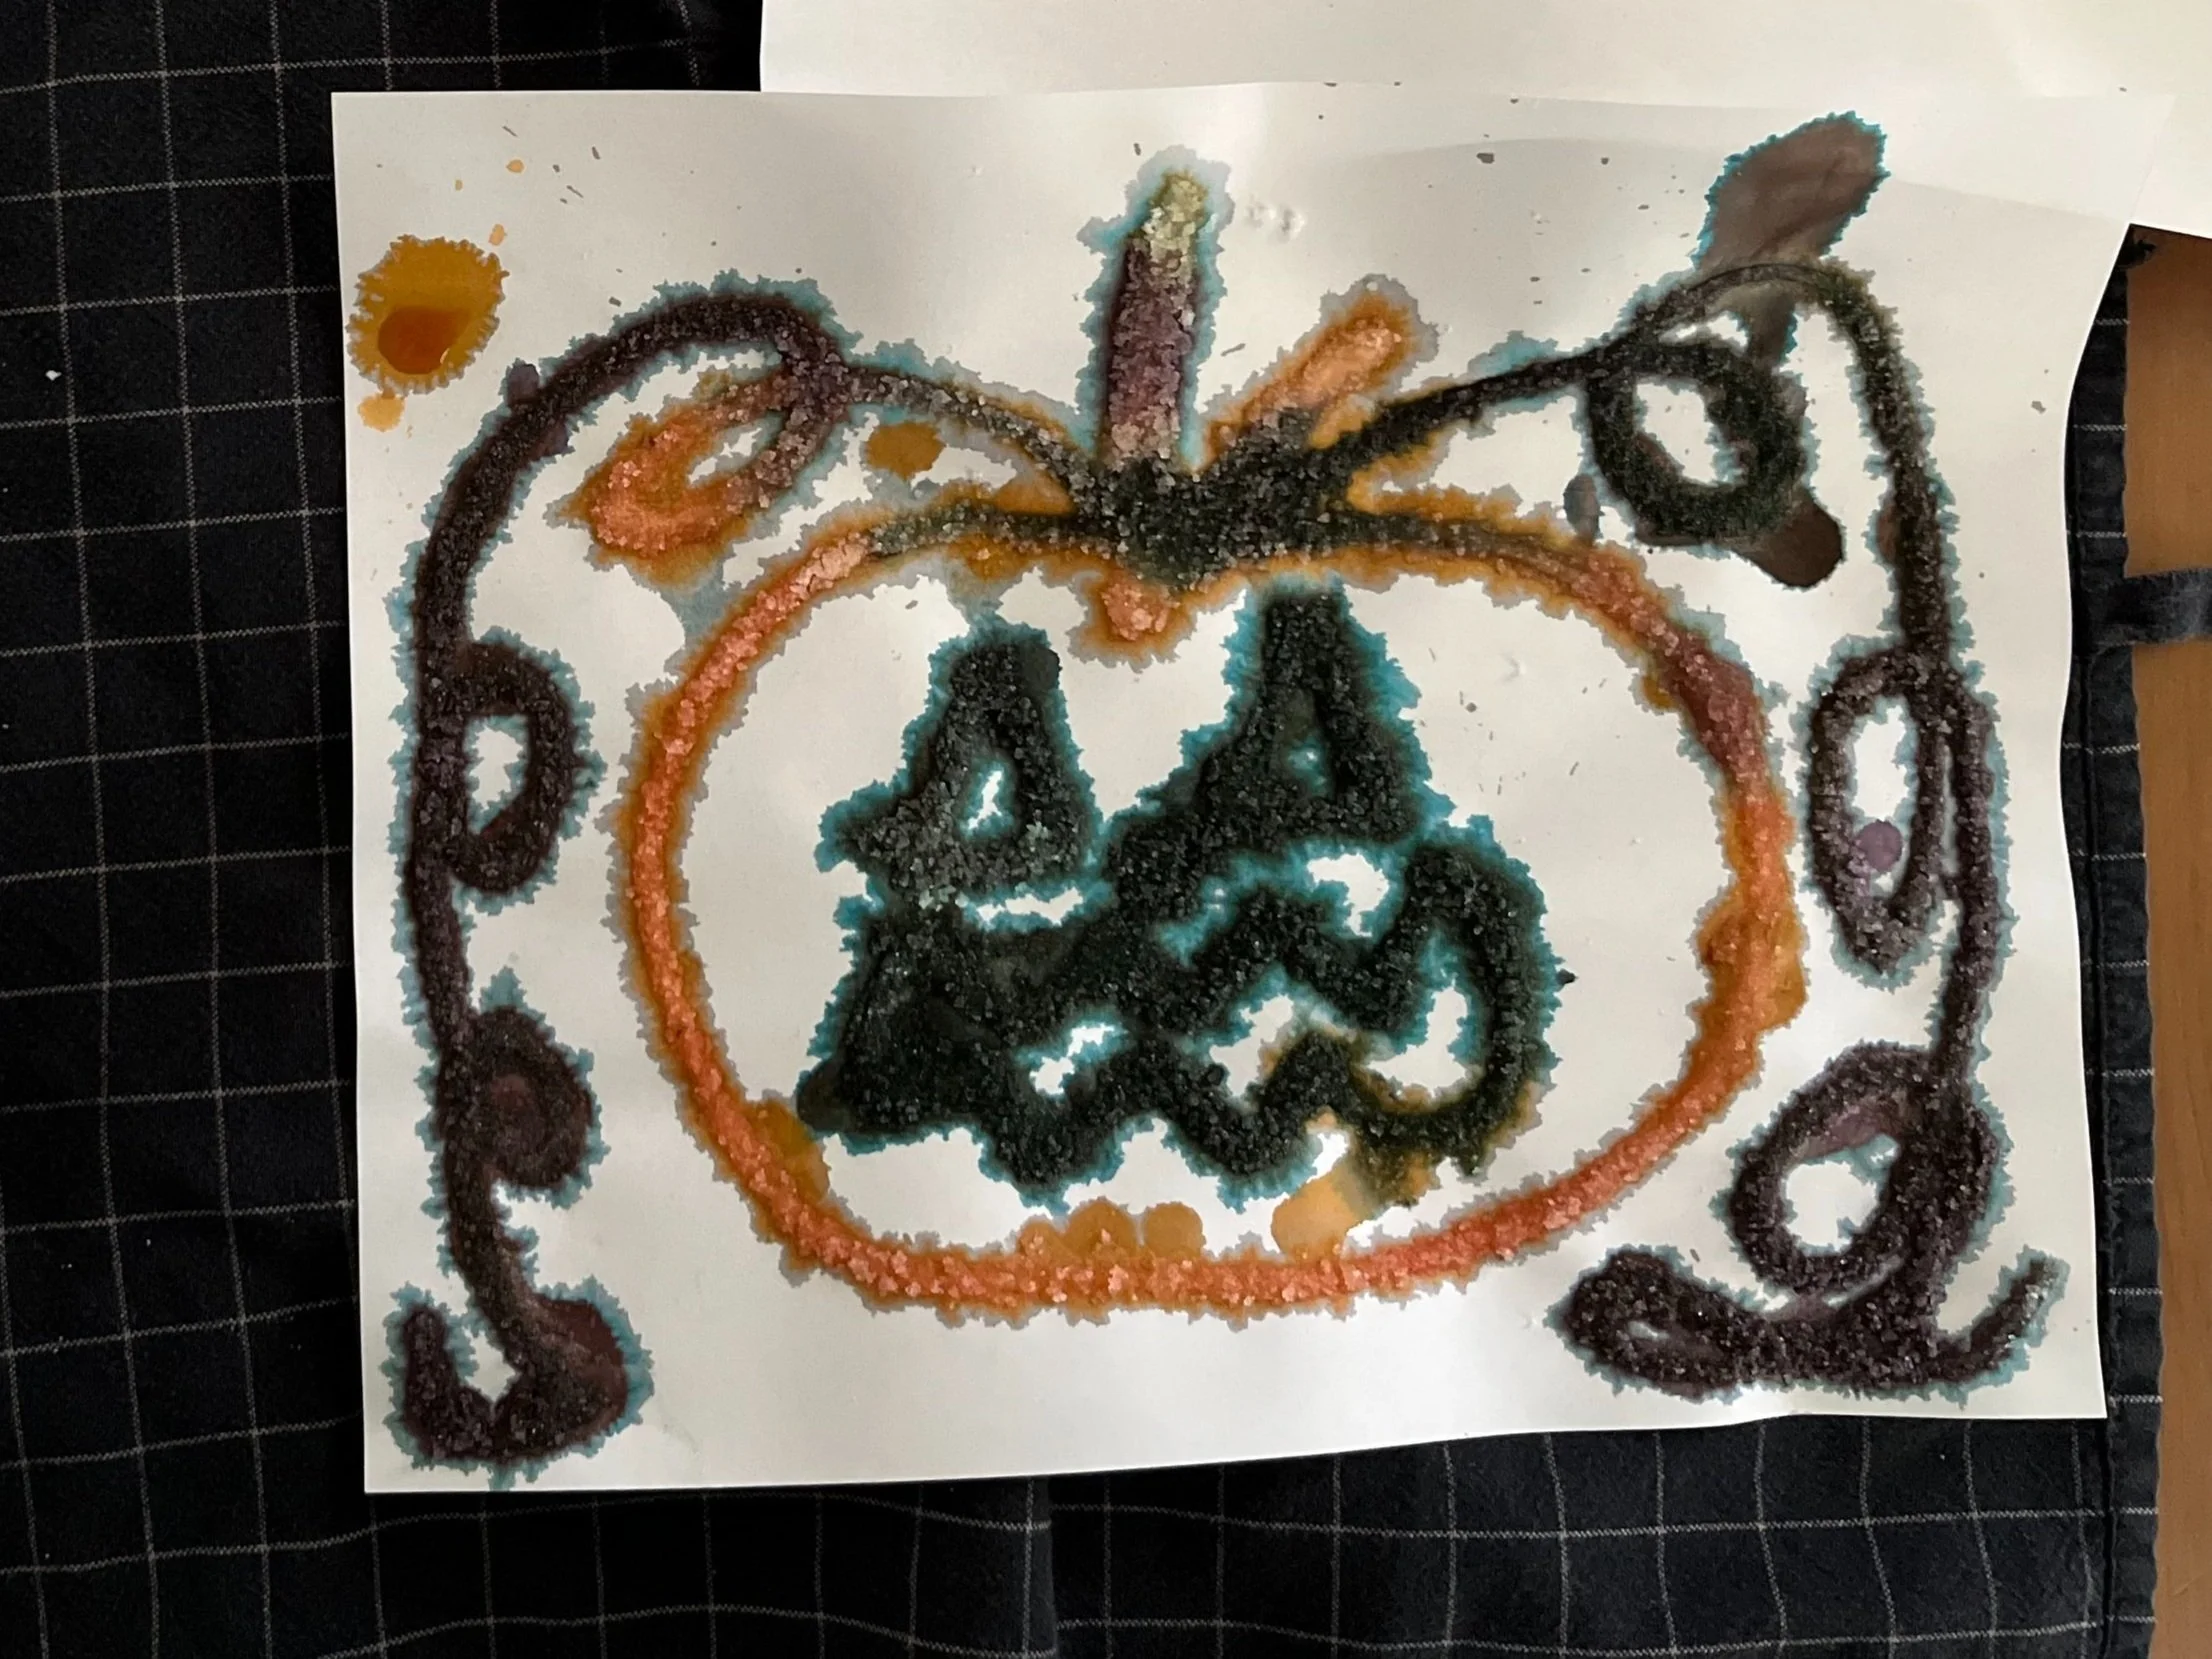
You can make all sorts of designs with your glue. Some of my favorites from the last few years include names, butterflies, trees, spirals, or geometric shapes. You can help your little ones with the drawings, especially because having connected parts of your glue artwork helps with the magic of the traveling color.
I hope you get a chance to try this activity. We kept ours seasonal with a Halloween theme, but you can do this any time of year. Comment below if you try this and share this post with a friend. I love seeing you on social media, so reach out there too!

You may also like…


Here is a list of books perfect for gifting or reading for Valentine’s Day or any day of there year your child might need a reminder of how much you love them!
I just added 4 of these to my cart!